Tie It Right or Lose It Forever: The Knots Every Kayak Bass Angler Needs in Their Arsenal
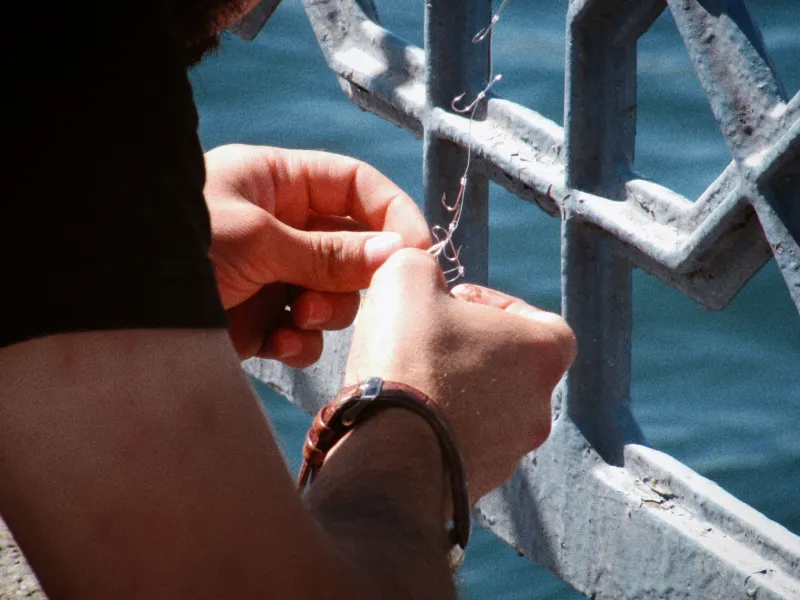
You're drifting along a grass edge at first light, the water's slick, and a four-pound largemouth just hammered your swim jig. You set the hook hard, the fish bulldogs toward the mat — and then it's gone. Not because your hookset was soft. Not because you lost your nerve. Because the knot you tied in the dark parking lot before the launch finally gave out under real pressure.
Kayak bass fishing puts a unique kind of stress on your terminal tackle. You're rigging in tight quarters, often with wet hands, sometimes one-handed while keeping your paddle from drifting off. Casting angles get awkward. You're low to the water, which changes how you fight fish. And when a big bass makes a run under the yak, that line sees serious strain at some weird angles.
The right knots — tied correctly, every single time — are the difference between a story and a screenshot. Let's break down the five you need, and then talk about the one that's quietly costing anglers more fish than they realize.
1. The Palomar Knot — Your Everyday Workhorse
If you fish one knot for the rest of your life, make it the Palomar. It's strong, it's consistent, and it's genuinely simple to tie even when your hands are cold or your fingers are slick with fish slime. The Palomar retains close to 100% of your line's breaking strength when tied properly, which is about as good as it gets in the real world.
Double about six inches of line, pass the loop through the hook eye, tie a loose overhand knot with the doubled line, then pass the hook through the loop and pull everything snug. That's it. It works on fluorocarbon, braid, and mono. It works on jigs, hooks, and most hard baits. Learn this one first, drill it until you can tie it without looking, and you've already solved most of your knot problems.
2. The Improved Clinch Knot — Old Faithful for a Reason
The improved clinch has been tying anglers to fish since before most of us were born, and it's still a go-to for good reason. It shines on lighter lines and smaller hooks — think drop shot rigs, finesse setups, and situations where you're using 8- to 12-pound fluorocarbon.
Thread the line through the eye, wrap it five to seven times around the standing line, bring the tag end back through the loop near the eye, then through the big loop you just created, and pull tight while keeping tension on both ends. Wet the knot before cinching it down. Dry friction is the enemy of a clean clinch knot — it weakens the line before it even sees a fish.
3. The Non-Slip Loop Knot — Give Your Lure Room to Breathe
This one doesn't get enough love in bass fishing circles, and that's a shame. Unlike knots that cinch directly to the hook eye, the non-slip loop knot creates a fixed loop that lets your lure swing freely. That means more natural action on topwater plugs, swimbaits, and jerkbaits — exactly the kind of presentation that triggers reaction strikes from pressured fish.
Tie an overhand knot in the line about six inches from the end, pass the tag through the hook eye, bring it back through the overhand knot, wrap it around the standing line four or five times, then pass the tag back through the overhand knot again. Pull it down slowly and evenly. The result is a loop that won't slip closed under load, giving your lure that free-swinging movement that can make all the difference on a tough bite.
4. The Double Uni Knot — For When You Need to Connect Two Lines
If you're running a braid-to-fluorocarbon setup — and honestly, you probably should be — you need a reliable line-to-line connection. The double uni is the most beginner-friendly option out there, and it holds up well even under the stress of a drag-screaming bass.
Overlap the two lines by about six inches, form a loop with the braid, wrap the tag end through the loop and around both lines five or six times, then pull tight. Repeat the same process with the fluorocarbon. Slide the two knots together, trim the tags, and you've got a connection that casts smoothly and holds firm. On a kayak, where you might be making that braid-to-fluoro connection while floating in a current, the double uni's simplicity is a genuine advantage.
5. The San Diego Jam Knot — A Sleeper Worth Knowing
Not everyone's heard of this one, but serious braid users swear by it. The San Diego Jam handles the slippery nature of modern superlines better than most alternatives, making it a smart pick when you're throwing heavy braid to punch through thick cover — exactly the kind of fishing that kayak anglers love because they can get into the shallow, nasty spots that bass boats can't reach.
Thread the line through the eye, double it back alongside the standing line, wrap the tag end around both lines six or seven times toward the hook, bring it back through the loop nearest the eye, then through the big loop. Pull it down firm and trim close. It's a bit more involved than the Palomar, but once you've got it dialed in, it becomes second nature.
The One Knot That Will Cost You a Trophy Fish
Here it is — the knot that trips up anglers more than any other: the improved clinch tied in braid.
Braid and the improved clinch have a complicated relationship. The slick, round fibers of modern superlines don't grip the way mono or fluoro does, which means an improved clinch can slip under load even when it looks perfectly tied. A lot of anglers don't realize this until a big fish exposes the weakness at the worst possible moment.
The fix is to either switch to the Palomar or San Diego Jam when you're using braid, or — if you're committed to the clinch — bump your wraps up to at least eight and double the line through the eye before you start. But honestly? Just use the Palomar. It's more reliable, it's faster, and it doesn't leave you second-guessing your connection when a fish of a lifetime decides to make a move.
The real danger isn't that anglers don't know about this incompatibility. It's that they tie the improved clinch in braid out of habit, under pressure, without thinking. You've done it before launch when it's still dark. You've done it mid-session when the bite's hot and you're rushing. That muscle memory is what gets you.
The solution is deliberate practice. Tie knots at home. Tie them in the dark. Tie them with wet hands. Pull-test every connection before you ever make a cast. And if you're running braid, commit to a knot that's actually built for it.
Before Your Next Launch
You don't need to be a knot nerd to fish well from a kayak. But you do need a short list of reliable connections that you can execute correctly under real-world conditions — cramped, wet, rushed, and distracted. The five knots above cover nearly every situation you'll encounter on the water. Learn them in order. Practice them until they're automatic. And the next time a big bass makes a run under your yak, the last thing you'll be worried about is whether your knot is going to hold.